Web Link Collection:
The below links are a compilation of links I've been collecting for the past few years. If you have a favorite link, please share it with me by leaving a comment.
1 - A - B - C - D - E - F - G - H - I - J - K - L
M - N - O - P - Q - R - S - T - U - V - W - X - Y - Z
- 6 Common Issues To Correct Before Submitting Your Photos To 500px Prime
- 7 Tips for Photographing Foxes and Other Animals in the Snow
- 8 Post-Processing Tips For Creating Beautiful Landscape Photos
- 10 Best Photography Tips For beginners
- 10 Handy Photo Tips For Shooting Outdoors This Winter
- 10 Macro Photography Subject Ideas
- 10 Tips For Photographers On How To Get More Followers
- 10 Tips to Improve Lightroom’s Speed and Performance Without Additional Hardware
- 15 Tips for Getting Razor Sharp Photos
- 21 Sample Poses to Get You Started with Photographing Men
- ACDSee Processing Workflow
- Adobe TV - How To
- An Analysis of Lightroom JPEG Export Quality Settings
- An Introduction to HDR Photography
- Ansel Adams - 1983 Interview
- Aspect Ratio: The Enemy of Digital Prints
- Cambridge in Color
- Camera Sensors Are Good – Your Eyes Are Better!
- Canon Rumors
- Canon Users – Don’t use Mirror Lockup!
- Composition: Simplicity, SEX and Balance
- Data Longevity on CD, DVD Media: How Long Will They Last?
- Digital Cameras - A beginner's guide
- Do You Really Need That Warranty Card?
- DOF Master (Calculator)
- DX0 Mark
- Efficient Lightroom Workflow for High Resolution Images
- EOS Canon Camera batteries
- Exposing to the Left vs. Exposing to the Right
- Exposure vs. Brightness vs. Fill Light
- Facebook's Privacy Terms for 2015
- Fast memory cards and card readers - Do you really need them?
- Flash Photography with Canon EOS Cameras
- Focal Length Changes 3 Things
- Focal Length, Field of View and Angle of View Defined
- Focus Stacking
- Fred Miranda
- F-Stop & Shutter Speed Explained
- Full Frame Myth
- How Bad is JPEG?
- How Digital Cameras Work
- How long do disk drives last?
- How to Avoid Copyright Infringement
- How To Create A Magical Holiday Bokeh Photo
- How to Create the Perfect Photo Composition
- How to Enjoy Macro Photography on the Cheap
- How to Get Paid What You’re Worth as a Photographer
- How to Install Actions in Photoshop
- How to Make Great Prints
- How To Make Memorable Photos
- How To Mix Natural And Flash Lighting Using Shutter Speeds
- How to Photograph Fireworks Displays
- How to Prolong Lithium-based Batteries
- How to Register Your Photos with the U.S. Copyright Office
- How to Take Sharp Photos
- How to Use and Buy Polarizing Filters
- Image Resolution And Print Quality
- Improve Photography
- Into The Night Photography
- ISO 500px Tutorials
- Lens Calibration Video Blog
- Lens Stabilization vs In-camera Stabilization
- Lightroom Killer Tips
- Luminosity Masks
- Magic Lantern
- Making it as a Landscape Photographer
- Martin Bailey Photography
- Matt Granger
- Mega Pixels & Image Sensor Size
- Megapixel Print Chart
- Memory Card Calculator
- Modify an EF-S to EF Lens
- Monitor Calibration Methods
- Most Popular & Favorite Tutorials
- Most Popular Screen Resolution Increases to 1366 x 768
- Panoramic photography - how to find the Nodal Point
- Photographer Employment Statistics
- Photography Basics
- Photography Printing Guide
- Photoshop CS6: The Missing Manual
- Photoshop Red Eye Fix for Difficult Cases - People and Pets
- Photoshop: Smarter sharpening with the High Pass filter
- PhotoZone DE
- Pixel Peeper
- Preparing Digital Files in Photoshop for Print
- Printing - Which Resolution?
- Printing Raw Files
- Pushing the Limits to Overcome Photography Boredom
- RAW vs JPEG, Myth or Fact? The Definitive Guide
- Resolution
- Rules for Perfect Lighting: Understanding The Inverse-Square Law
- Selling Posters, Postcards and Calendars
- Senior Pictures
- Sharpening 101
- Snow Fakes - Don Komarechka
- Star Tracker (Night Photography)
- Strobist Preliminaries
- The Complete Beginner’s Guide to Shooting High Key
- The Harris Shutter Effect
- The High-Wire Act of Getting Photo Permits
- The Myth of DPI
- The Photographer's Ephemeris
- The REAL Reason that Canon vs. Nikon Will Never Die
- The Real Truth About JPEG images
- The Russell Brown Show
- Thom's Quick & Dirty Guide to RAW
- Tips for using a polarizing filter
- Tips From The Top Floor (TFTTF)
- Top 12 Macro Photography Tips
- Tutorial: Estimate JPEG Quality
- U.S. Copyright Case Law
- Ultimate Hair Edge Masking Technique in Photoshop
- Understanding Camera Numbers: Aperture f-stop, Shutter Speed, ISO
- Understanding Gamma Correction
- Understanding RAW File Format
- Understanding the Lightroom Catalog and File Management System
- Using Graduated Neutral-Density Filters
I suspect not many Facebook users really think about sharpening their photos before posting. And it may seem odd to include piracy in the same blog---certainly, each can stand alone, but since they relate so nicely together, I thought I'd combine them.
For sharpening, if you don't have the right tools on the device you are using to post, it's not going to happen. Furthermore, is it even worth it? For candid spontaneous selfie shots probably not, but if you have the time and the tools, I think it is.
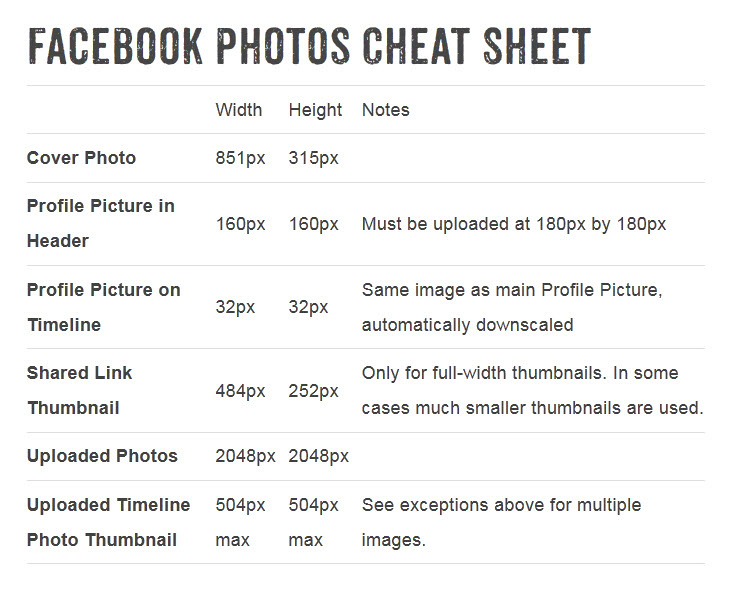
Most know by now that Facebook resizes (downsizes) images automatically if you try to upload anything larger than 2048x2048 (see Facebook Photos Cheat Sheet below) . Many DSLRs can produce images greater than 12MP (4000x3000), so if you post images directly from your camera, then Facebook will automatically resize them. In this process, your images get compressed and lose sharpness, among other things (this applies to other social media sites as well).
As far as piracy is concerned, at the max Facebook size you can print a fairly good quality 5x7. To avoid other not-so-friendly users from stealing your work, posting photos at about 640x480 (4:3 aspect ratio) or 630x420 (3:2 aspect ratio) is best. At this size, the print quality drops significantly. In fact, it's almost unusable. However, the Web quality is still very good. If you resize smaller than this, it starts to work against your intention of showcasing your work at it's best (in my opinion). Don't concern yourself with DPI---this is Dots Per Inch and relates to prints, not the Web.
Of course, there are still pirates out there who would steal your images for Web uses (i.e. Web design, online advertising, etc.), so the only way to really protect your work is to not post anything on the Internet <period>. How practical is this, especially if you have a web-based business?
Nevertheless, to showcase your images on Facebook with the best sharpness for the Web, you should resize first, then apply sharpening. Some photo editors (i.e. Lightroom) apply "output sharpening" for you automatically, but many don't. The type of sharpening and how much is entirely dependent on the image detail and image size. I was surprised to find that there are entire books written on the subject of sharpening.
So the next time you post a photo on Facebook, there are two things to remember:
- If you want to avoid the possibility of your photos looking blurry, resize them first, then sharpen before uploading.
- If you are worried about someone stealing your photos, never upload anything to the Internet (Facebook or otherwise). However, if you are willing to assume a small amount of risk, then 640x480 is a good place to start (I generally use 1200x800).
------------------------------------------------------------
Note: The question of who has copyright of your photos after posting to Facebook comes up a lot. The short answer is YOU retain copyright of your photos. Moreover, you are not giving up copyright by posting your photos on Facebook, but rather you are agreeing to let Facebook use your photos as they see fit. Some might say there is no difference, but there is.
If someone downloaded your photo from Facebook and used it for personal and/or business gain, then you have a right to sue for damages---provided you can show damages. If you want to make sure your photos are properly documented as being your work, then you need to register each photo with the copyright office.
------------------------------------------------------------
Facebook Terms and Conditions
Sharing Your Content and Information
You own all of the content and information you post on Facebook, and you can control how it is shared through your privacy and application settings. In addition:
- For content that is covered by intellectual property rights, like photos and videos (IP content), you specifically give us the following permission, subject to your privacy and application settings: you grant us a non-exclusive, transferable, sub-licensable, royalty-free, worldwide license to use any IP content that you post on or in connection with Facebook (IP License). This IP License ends when you delete your IP content or your account unless your content has been shared with others, and they have not deleted it.
- When you delete IP content, it is deleted in a manner similar to emptying the recycle bin on a computer. However, you understand that removed content may persist in backup copies for a reasonable period of time (but will not be available to others).
- When you use an application, the application may ask for your permission to access your content and information as well as content and information that others have shared with you. We require applications to respect your privacy, and your agreement with that application will control how the application can use, store, and transfer that content and information. (To learn more about Platform, including how you can control what information other people may share with applications, read our Data Use Policy and Platform Page.)
- When you publish content or information using the Public setting, it means that you are allowing everyone, including people off of Facebook, to access and use that information, and to associate it with you (i.e., your name and profile picture).
- We always appreciate your feedback or other suggestions about Facebook, but you understand that we may use them without any obligation to compensate you for them (just as you have no obligation to offer them).
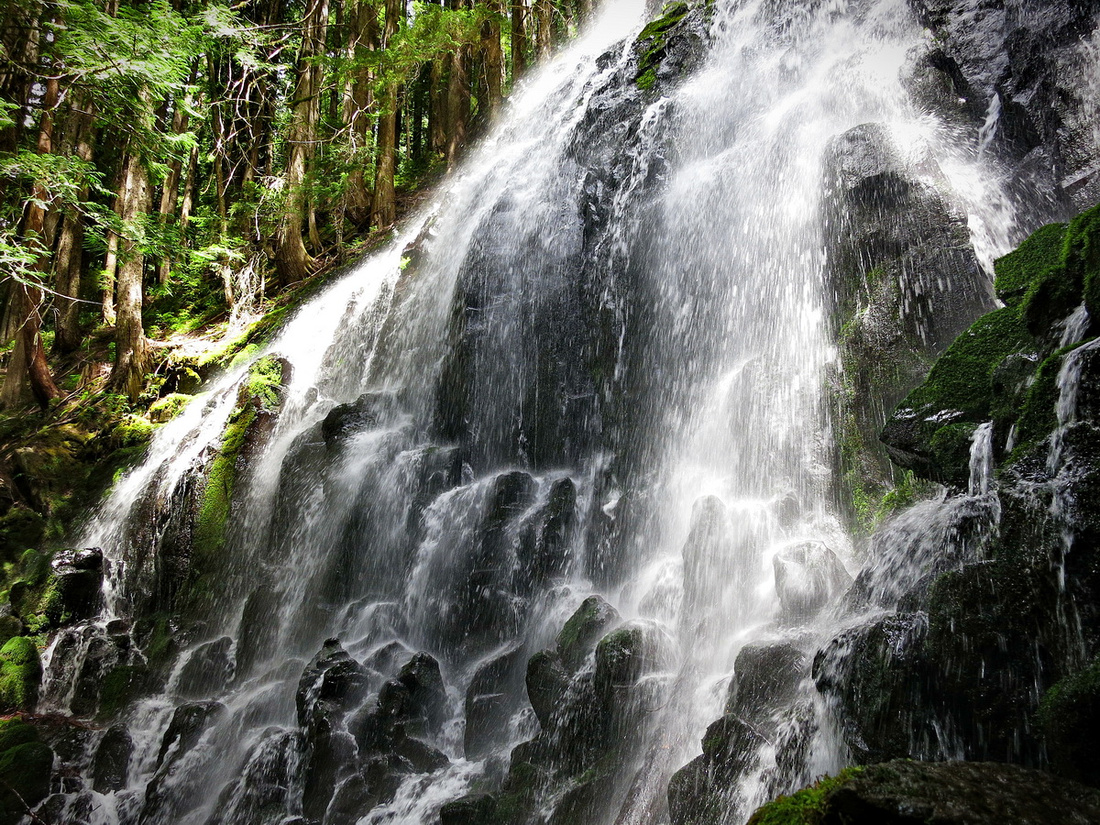
There is some debate about how to correctly photograph moving water. For me, it's simple---I photograph what looks good to me, not necessarily what others think is correct. However, I do get feedback sometimes that my waterfall shots are not "realistic" or "not true to life". I guess the first thing that goes through my mind is what does "realistic" moving water look like in a still frame? How can anyone capture this without shooting a video?
I intentionally expose longer than the camera normally would in full auto mode. This does give the water a more "milky" look and feel, but it is more pleasing to my eyes. Regardless, it's a matter of choice, and there really isn't a right or wrong way to photograph things that are moving. It really depends on what you are trying to convey in a single frame.
Here are two photos taken recently on my hike to Romona Falls in the Mt. Hood Forest. You be the judge as to which one you like better, and leave me a comment below on your preference. Thanks!
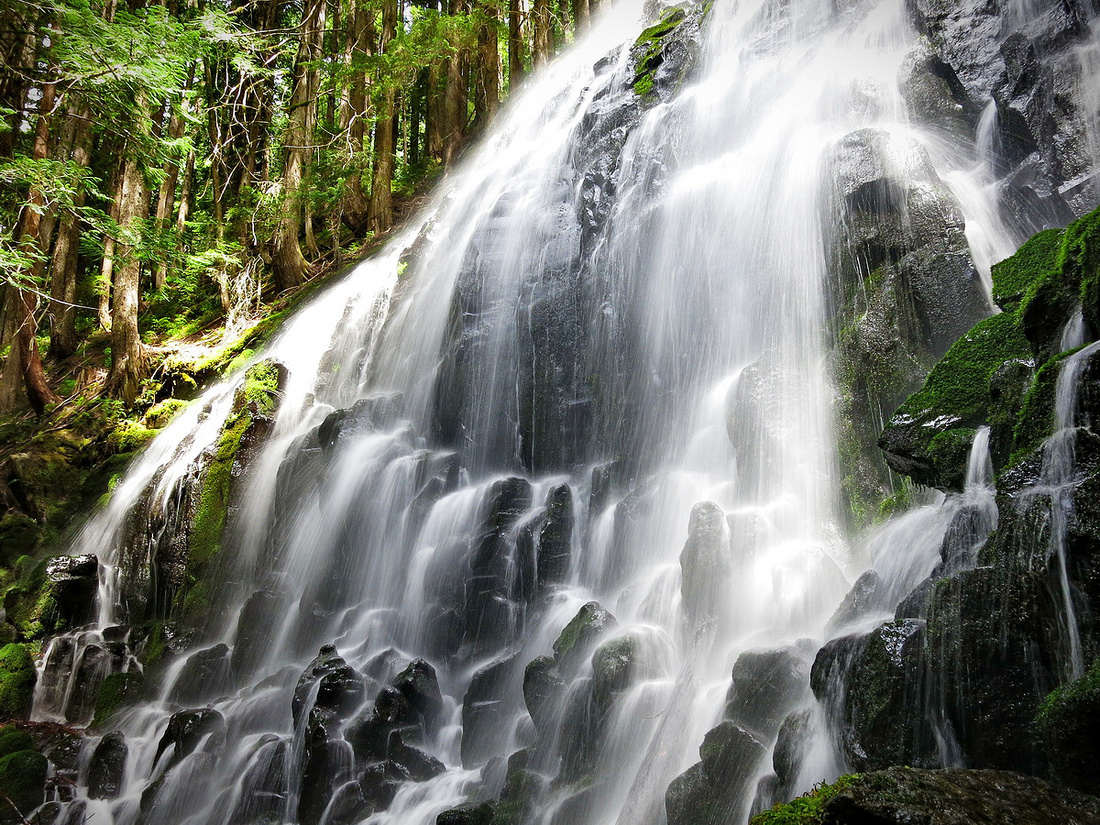 This was shot at 1/8 of a second (i.e. slow shutter speed). My camera was in manual mode.
 This was shot at 1/60 of a second (fast shutter speed). My camera was in full auto mode.
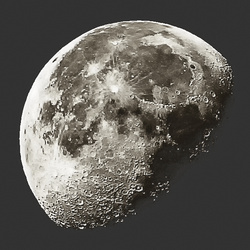
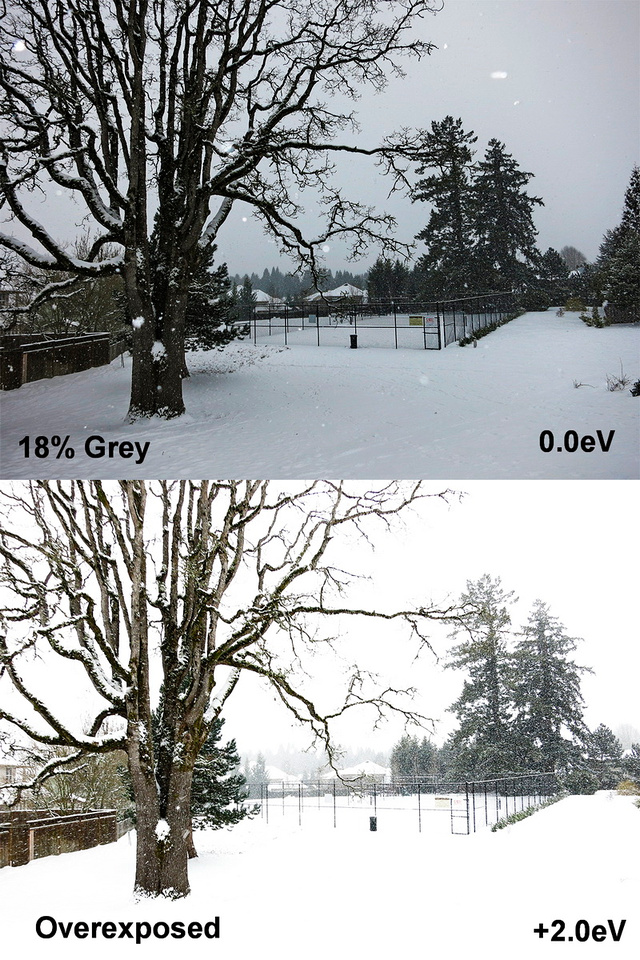
Have you ever wondered why some of those snow photos look more grey than they do white? It's because our expensive fancy cameras are color blind and try to meter everything in shades of grey---18% grey as a matter of fact. Therefore, if you let your camera expose a snowy scene, it will most likely be under exposed. Fortunately, you can compensate for this by changing the "eV" or exposure value. Give it a try---it's pretty easy to do; read your camera manual to learn how. Here's an example: In the top photo, I let my camera do all the thinking. In the bottom one, I increased the eV by 2 stops.
Increasing it by 2 stops was actually a bit too far, so the bottom exposure is slightly overexposed. I probably should have only gone up by 1.5eV. Regardless, the truth is, sometimes the camera is not as smart as we are. :-)
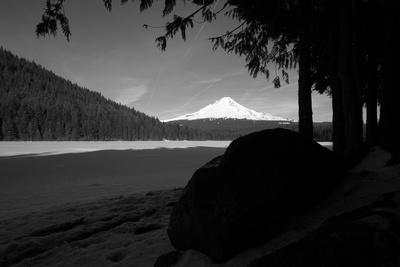
HDR or High Dynamic Range is something our eyes naturally have, but cameras don't. This shot is actually a combination of 7 different exposures from dark to light. I then merged them in Photoshop.
The great thing about HDR is that you don't need a special camera or shoot in a special format (raw). All you need to do is take a series of photos at different exposure values. The way you do this is by ONLY changing the shutter speed for each frame. Take one shot underexposed, one normally exposed, and one overexposed. Of course, you'll need a program like Photoshop to combine all three shots if your camera doesn't do this for you.
 Underexposed Underexposed
|
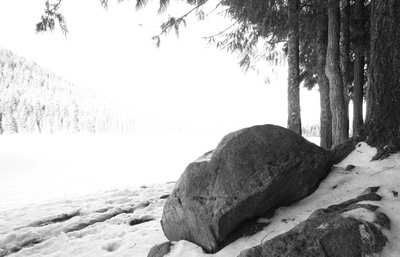 Overexposed Overexposed
|
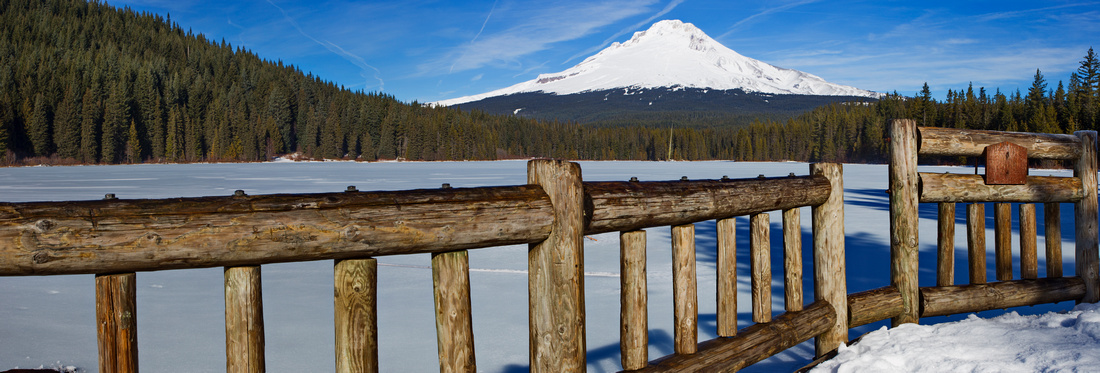
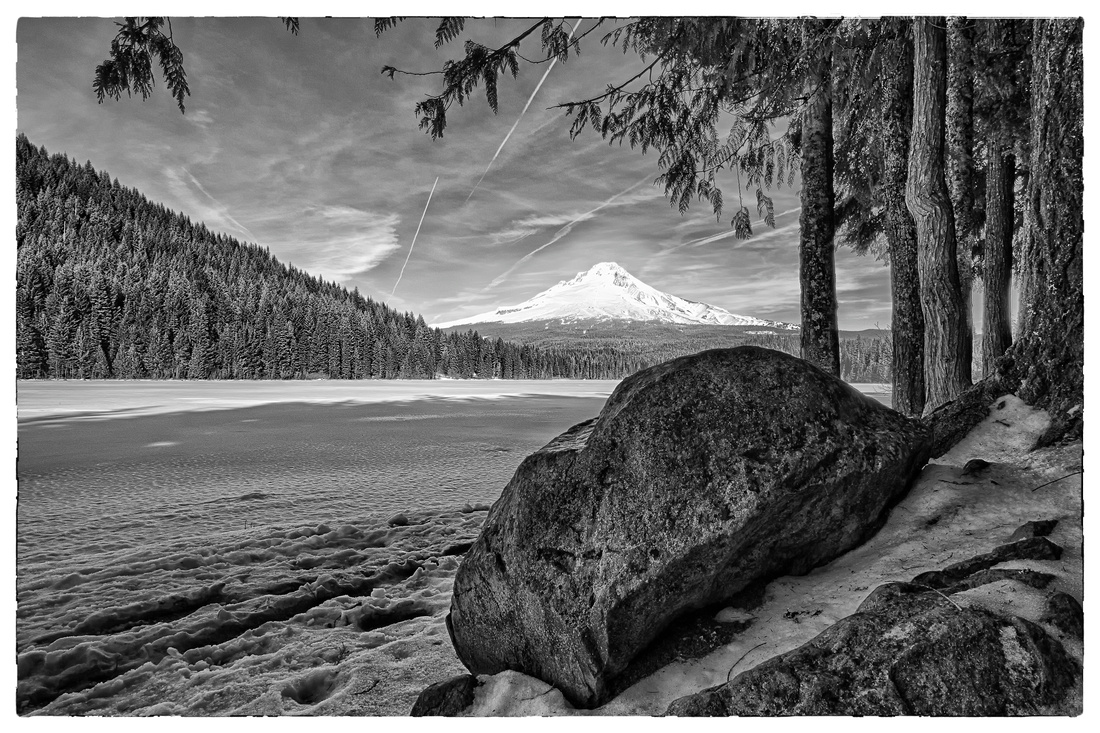 Trillium Lake, Mt HoodCanon 6D, 1/45s, f/22, ISO 100, 17mm
Have you ever accidentally deleted a photo? You are not alone, but there is help... Download this app and recover deleted photos on your SD card even if it has been formatted.